Yosemite’s Halfdome is a legendary bucket list hike, I’m so glad we decided to do this alternative instead.
The highest point in Yosemite Valley sitting at 9,931 feet, Clouds Rest is a difficult yet scenic trek that takes you across a variety of landscapes and has quite possibly the BEST view of Yosemite Valley available. If you can make it to the summit as a winter ascent, you’ll likely have the place to yourself, soaking in a magical sunset there was one of my top life memories to date.
Doing so is easier said than done, a hard enough hike without snow, a winter ascent adds a number of difficulties. I was quite intimidated by the number of winter ascent failures I found while researching clouds rest, there was really only one success story on youtube, and many MANY people who had to call it quits before reaching the summit, usually for more or less, the same few reasons.
In this article, I’ll explain why so many people fail, what we did to succeed, the route itself, gear, logistics, water sources, and views along the way!
Before You Hike
Unless you’re an Olympic trail runner with tons of experience in winter mountaineering, you likely won’t be completing this as a day hike (although I’m sure it’s possible).
We stayed in Little Yosemite Valley one night, then on the south face of Clouds rest the second night. If you plan on staying overnight, you’ll need to secure a Yosemite wilderness permit. These are tough to come by in the summer months, but in the winter, we were able to just walk up to the visitors center and get one on the same day! You’re also required to carry a bear can, although if you’re doing this as a two-day trip and not wild camping, Little Yosemite Valley has a bear box so you can save on weight.
The trail is also fairly difficult to follow in the winter since everything is covered in snow, so make sure you have either paper maps and a compass, or some sort of GPS device. Be wary of following footprints! The person before you may not have known where they were going either. I used Alltrails to make sure we were on the right path, although we did do some short bushwhacks more than a few times.
If you don’t have snowshoes, you’ll need to rent some from the Yosemite Badger Pass Ski area, for about $25 a day. Keep in mind that the ski area is about a 45 min drive from the trailhead, although it’s a very scenic road that goes through Tunnel View!
We’ll get to gear a little later, but make sure you’re bringing the right equipment (Definitely at LEAST snow shoes and crampons) and cut out that extra weight! You will find a direct correlation between pack weight and happiness on the trail.
ALWAYS check the weather before a winter ascent via the Official YNP Conditions Update webpage or call 209-372-0200 for the current weather and road closure status.
You can also check the National Weather Service 3-day and extended weather forecast which is updated at (4am and 4pm PDT).
Also check out the following web cams of nearby Half Dome:
Getting There:
Once you fill out your permit, you’ll receive an overnight parking sticker for your car windshield (how nice of them!). You can park at the lot just past Curry Village, near the Happy Isles trailhead. There are bear boxes to stash your excess food in, as an eighth-inch of glass car window never seems to quite do the trick.
The Route:
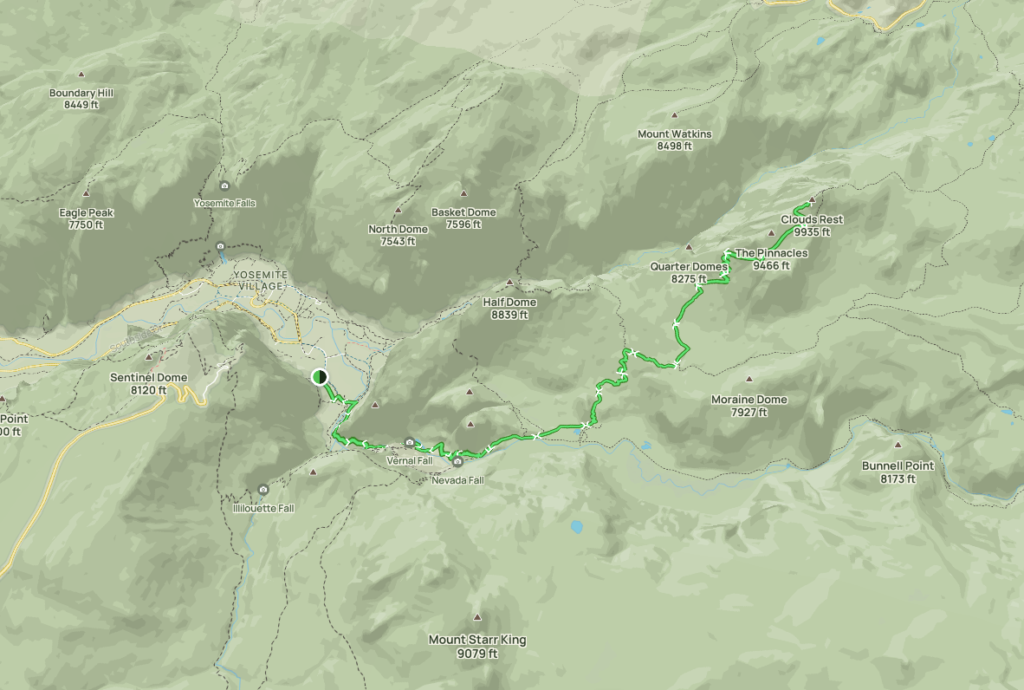
Clouds rest must be done as an out-and-back trail, due to some trail closures, the alternates add about 4 miles round trip, for a total of 24 miles, and just under 7000 ft of elevation.
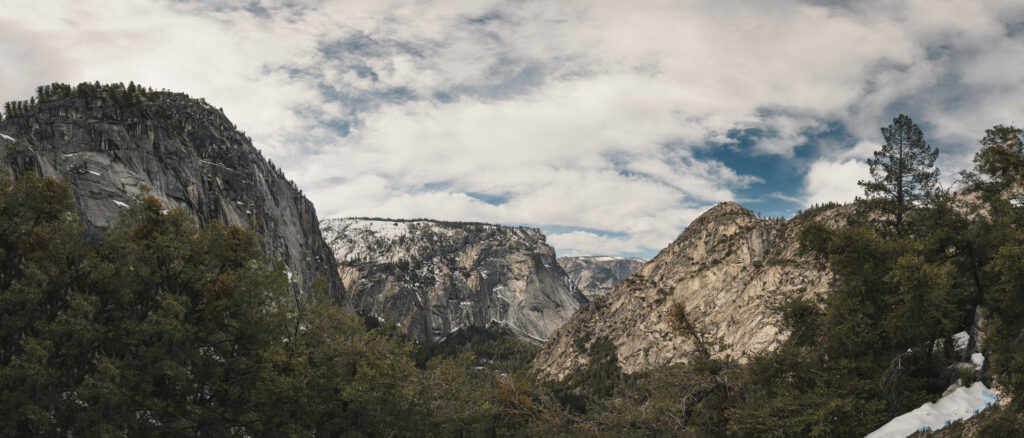
Now it’s time to start your hike! Make your way down the Happy Isles rd and you’ll soon be connected to the John Muir trail. The first quick segment on the JMT features some instant jaw-dropping views of some granite peaks, and a nice trip over the Merced River footbridge with views of Vernal falls.
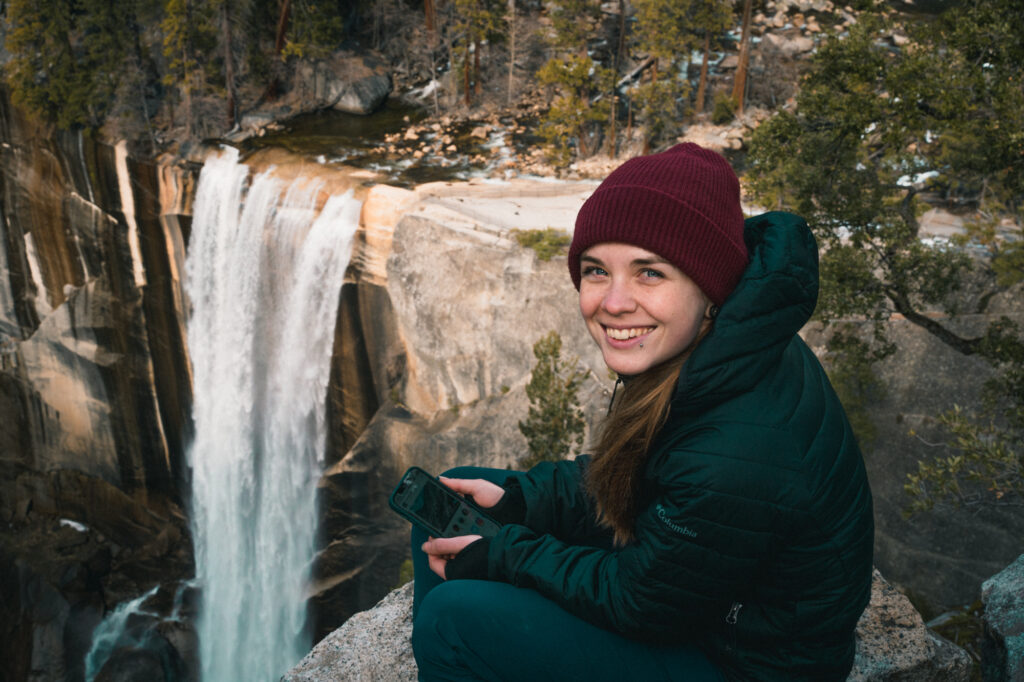
There are several trail closures on the Clouds Rest winter route, but just follow the very obvious bright orange winter route signs and you’ll be naturally routed the right way, moving back and forth from the JMT, and the Mist trail.
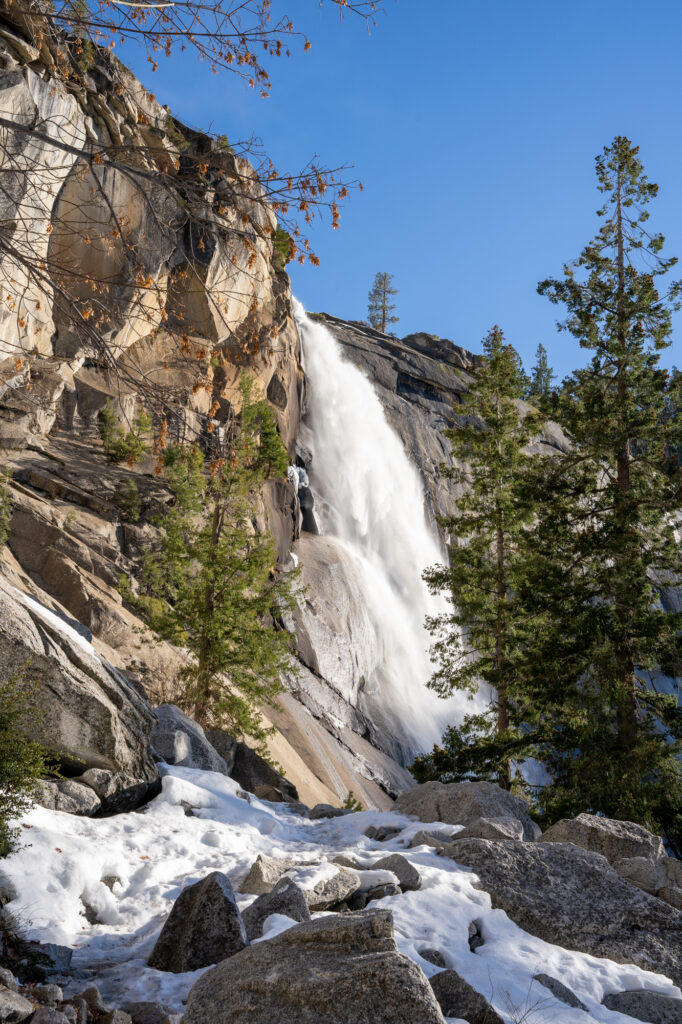
About two miles in you’ll reach Vernal Falls which is Gorgeous! We chose this as our lunch spot and it’s a great place to refill your water. .8 miles further and you’ll come to Nevada Falls, another classic Yosemite waterfall.
The whole first segment had off-and-on snow, nothing we really needed snow shoes for, but be prepared to remove and put on crampons fairly regularly.
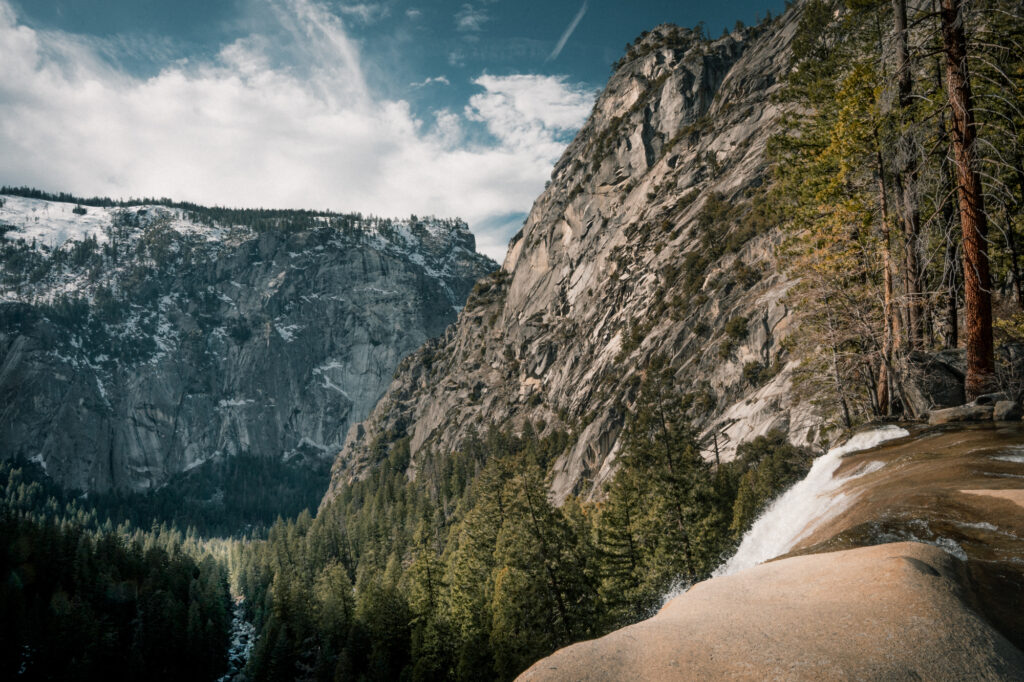
Two miles further past some more gorgeous lookouts, you’ll reach Little Yosemite Valley. You’re right on the Merced River so water is a breeze. Be sure to fill up before your next day’s ascent, as there are no water sources for the remainder of the trip until you loop back down. There is also a bear box and a firepit with some nice seats to rest your weary cold bones.
Be warned, there are some highly aggressive and intelligent crows that stalk this area, DO NOT leave your bag unattended, I watched one open a zipper, and fly off with my toothbrush after eating several of my snacks.
You’re going to want to start as early as possible the next morning, as this next segment is a doozy! It starts with some nice redwood forest with minimal snow, but don’t let the quaint and easy appearance fool you. Many switchbacks lie in wait. The snow gradually begins to build and you’ll definitely want to keep those crampons handy.
At about the seven-mile mark you emerge from the treeline to some jaw-dropping views of the valley. Your journey is still far from complete, but at least you get to look at the back of Half Dome for the remainder of the segment. It was at about this point that we needed to switch to snowshoes.
The final stretch is a brutal 1.5-mile uphill climb, this was where we stopped seeing footprints, and just kind of went for it. The altitude does NOT help, and after reaching the top, we set up the tent and had a little breather before climbing the final summit. It was the most comfortable that my sleeping pad has EVER felt.
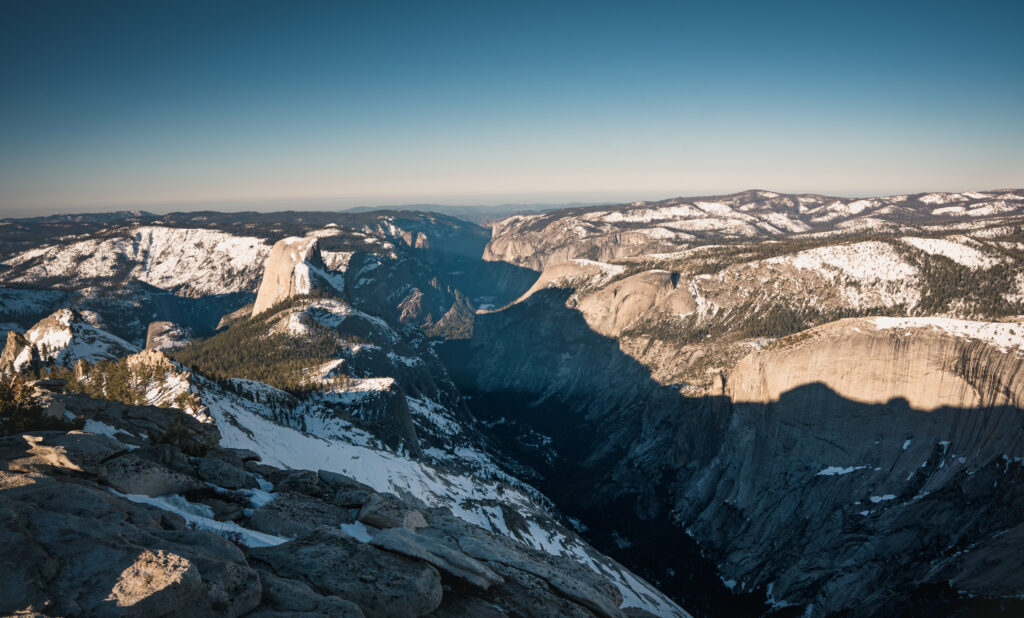
This entire time, there are stunning views of the valley below, when you reach the top, there’s a roughly 25-foot granite cap that blocks the view of everything else, this makes the final ascent pretty climactic, you essentially go from a 180ish degree view to a 360-degree view.
The Summit
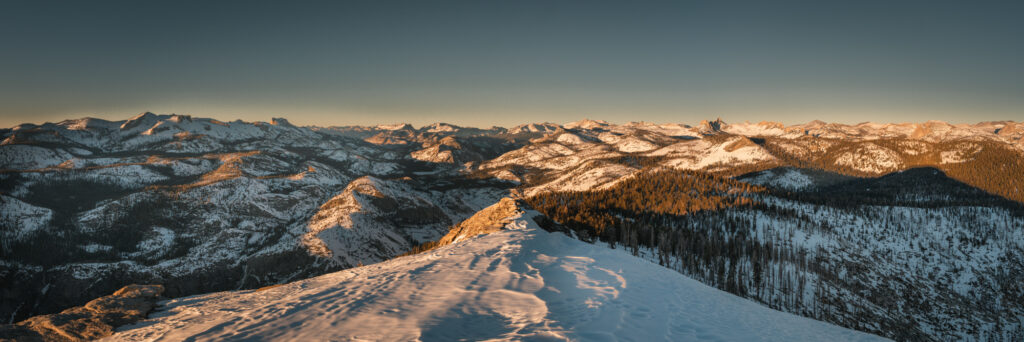
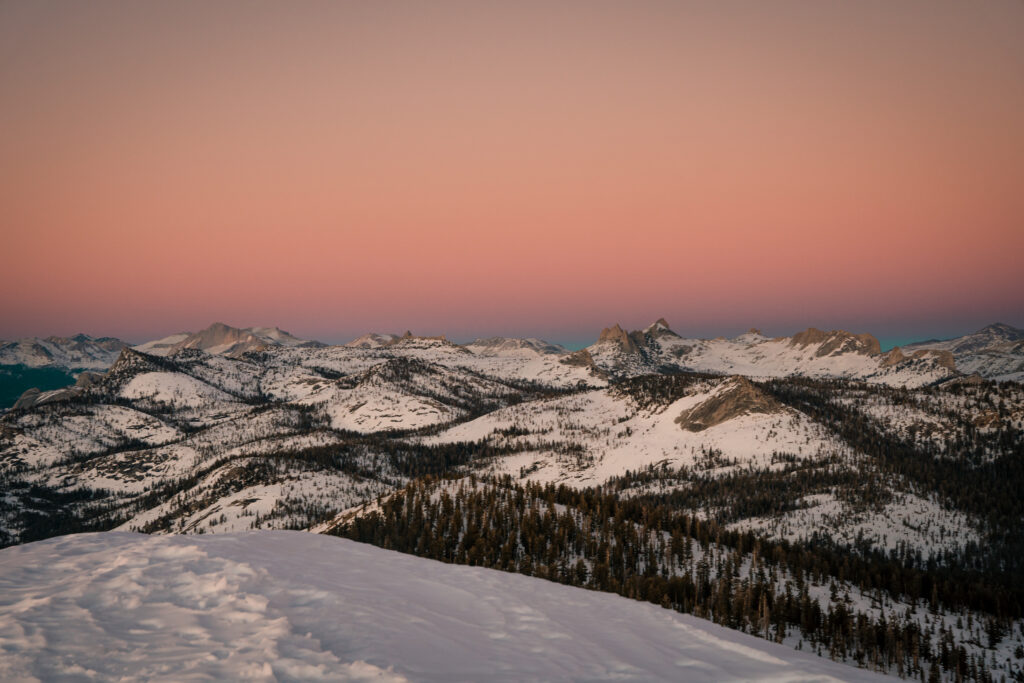
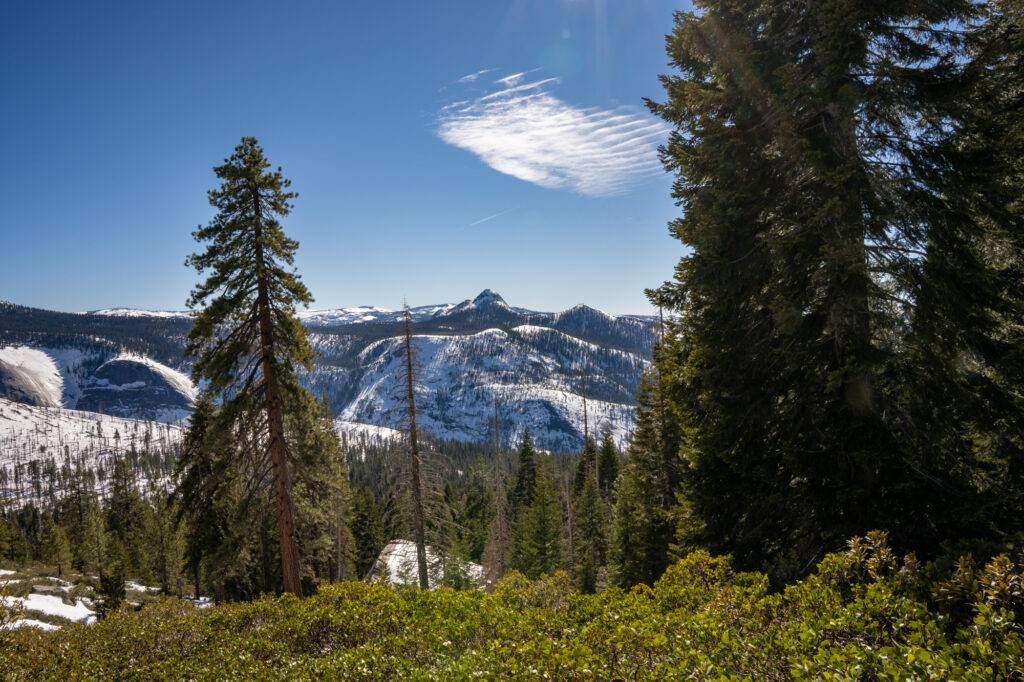
I’ve seen a LOT of beautiful views in my life from all over the country, but this was hands down the best one I’ve ever seen. Clouds rest is pretty much the epicenter for views in Yosemite National Park. You’re right up against (but still above) Half Dome and you can see far into and past the valley. Behind you, there are insane views of the Sierra Nevada, including the Clark Range, the Cathedral Range, and the Sawtooth Range.
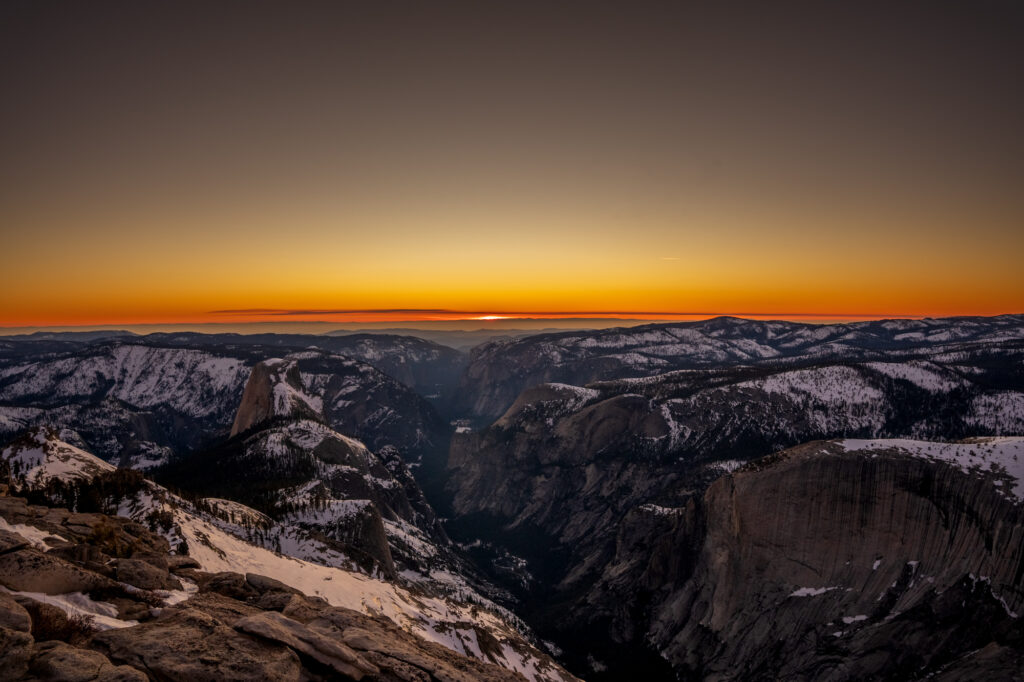
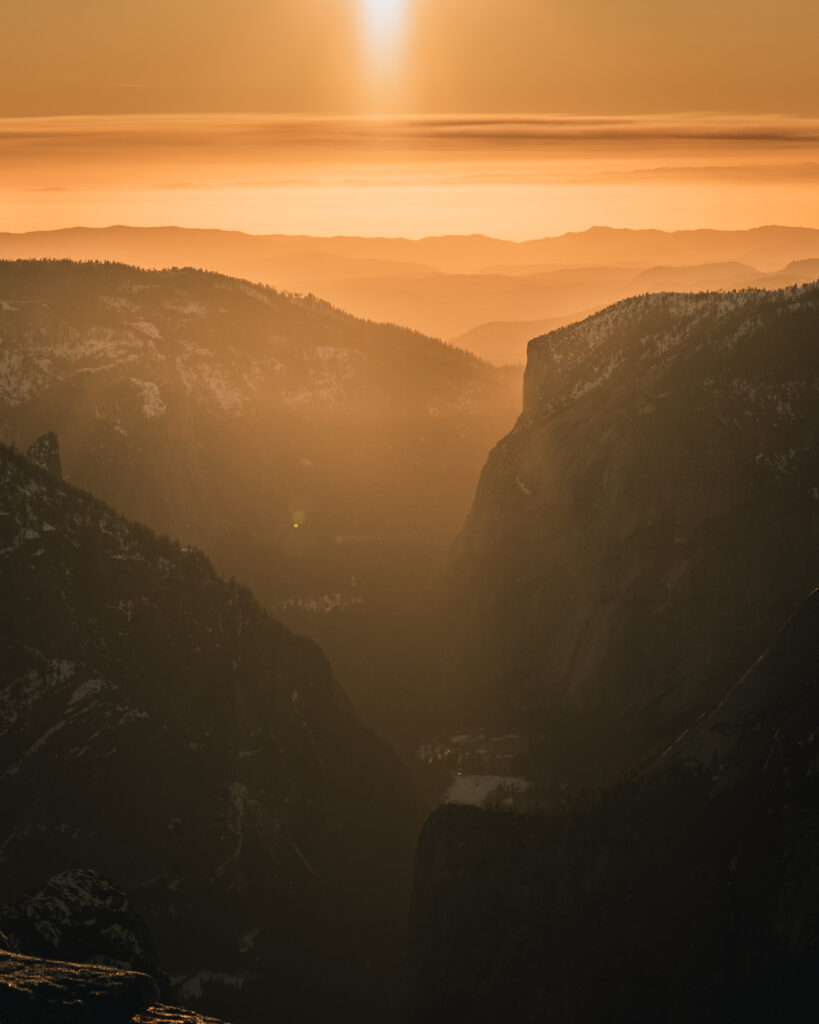
I highly recommend camping about 100 ft from the trail just below the granite cap. Since our camp was so close to the summit, we were able to watch the sunrise and sunset from the peak. A stunning memory that I will never forget. The sun sets directly in the valley around February, making it the best sunset time of the year! Nothing like a morning coffee with those kinds of views!
We left around noon the next day, and made it the ten miles down in about six hours, we grabbed an overpriced frozen pizza from Curry Village and got a room at the Yosemite View Lodge for some much-needed recovery.
Leor Pantilat Put together this cool list of landmarks you can see along the way:
- Vernal Falls – on the Mist Trail
- Nevada Falls – on the John Muir Trail
- Liberty Cap – in Little Yosemite Valley
- Backside of Half Dome – in Little Yosemite Valley
- Mount Conness – viewable from the summit
- Mount Lyell – viewable from the summit
- Mount Hoffman – viewable from the summit
- Mount Watkins – viewable from the summit
Why Hike Clouds Rest in the Winter?
Solitude: There are many MANY reasons why you would want to visit Yosemite in the winter. I would consider it a hidden gem of a national park as soon as the snow begins to fall. According to the NPS website “Although the park is open all year, nearly 75% of visitors come during the busiest six months (May through October).” Even driving through the park we didn’t see all that many people, a stark contrast to the summer crowds.
One of the few: While few visit Yosemite in the winter, even fewer ever make it to Clouds Rest. You could be one of the few people to catch a glimpse of this winter wonderland summit!
The sierras in the winter… WOW: Although the Sierras and Yosemite are beautiful all year round, they are truly a special place in the winter. Every mountain is snow-capped, and the alpine glow is out of this world.
The Challenges:
As I mentioned before, there are very few success stories out there, let’s dive into that. Of the dozens of articles and videos that I watched in researching this, were two main (and similar) reasons, both of which involved being underprepared.
No traction equipment: A good number of would-be Clouds Rest hikers, were stopped dead in their tracks by those first few icy switchbacks. Some even before reaching Vernal falls. Luckily bringing crampons is a simple remedy to this! When we did it in February, there was not a need for an ice ax, however, if you’re attempting it any earlier in the season I would recommend bringing one. Snowshoes are less of a safety concern and more of an energy-saving factor. They may be heavy, but carrying a pair is certainly a better alternative to post-holing yourself to exhaustion.
Bringing too much: There’s no way around it, you need a lot of tools to survive in the winter, and bear cans and snowshoes are not exactly light… However, the people that brought traction and still didn’t make it up, for the most part, turned around due to exhaustion. As a helpful tidbit, most of these videos include a gear list at the beginning! Some of these packs looked like they could have weighed 70+lbs, one couple brought almost a week’s worth of food “just in case”. And another duo of friends tried to lug a heavy multi-person tent up, the list of bizarre and excessive pack loads could go on for hours.
What to bring:
Everybody loves gear! And there’s no one setup that works for everyone, the best way to assemble a pack that works for you is trial and error. My stuff worked great for me, and even if it’s not what you’re looking for, there are still some general concepts that should still be followed.
Clothing: You’re only going to need one set of clothes (except socks). This will save a lot on weight, and a good system of layering means you can regulate your body temperature. The most important thing you can do in the winter is to not sweat. If you feel yourself getting warm, take the time to strip off a layer or two. Otherwise, you may be at risk for hypothermia as the day gets colder, or once you stop strenuous movement and cool off.
My winter setup has changed over the years, but this is the first winter that I can say It finally hasn’t. Which is good! I’ve found a versatile setup that works for me. I think this would work for a lot of people, but depending on how warm/cold you run, you might want to try out some other options, or add/remove some layers.
My winter setup consists of:
Clothing:
- Marino Wool Baselayer: Quick drying, and a great weight to-warmth ratio, although I only really wore these at night, as well as the cold mornings. I love the set that you can get at L.L Bean
- Thick Wool Socks: Wool shines through again as a superstar winter material! I carried two pairs, one on my feet, and one drying on the back of my pack. I used a combination of several different brands. But Darn Tough Mountaineering socks paired with the right boots will keep your toes cushioned and toasty!
- Down Puffy Midlayer: Down is king in terms of weight-to-warmth ratio. It also compresses the best for less pack weight when you’re moving hard and warm enough in just a base layer. Although I would recommend a synthetic option for wetter climates, or severe weather, my Mountian Hardwear Ghost whisperer 2 would have worked great in the relatively stable valley.
- Water Resistant Shell: Weather in the mountains is always unpredictable, and even if you don’t get rain or snow, you’ll certainly want a good windbreaker for when you’re at the top of those passes. I like something extremely lightweight that was ventilated enough to hike in, so I typically would pack the Montbell Versalite rain jacket. Made from Gortex Infinium, this is not a true winter shell, but its a great layer to have on top in stable weather conditions.
- Hat and Gloves: Another area where Marino wool shines supreme. I had a pair of North Face gloves and a hat that I got in an airport shop.
- Boots: Snow makes a great pad, so although you’ll be tired, your feet won’t feel as bad as if you were doing the same mileage over some rocky terrain! It can get quite wet however so you’re going to want something waterproof, but also high enough to prevent your feet from getting wet if you sink in a couple of inches. You also might want to explore the use of gaiters if snow levels will be high enough for post-holing to be an issue. I used the Colombia Omni-Heat boots, which kept my feet warm and dry.
Shelter and Sleeping:
- Tent: Camping on top of a pass is gorgeous, but that wind ain’t no joke! We used a free-standing MSR Hubba Hubba 2-person tent. You’re going to want something light enough to lug up 7000 ft, but also strong enough to resist wind, and weatherproof enough to take care of any snow that might come our way. It also prevents condensation due to its great ventilation system, which is essential in the winter.
- Sleeping Bag: It was getting into the 20s/high teens at night. I brought a heavy (but warm) Marmot Trestles Elite 0-degree bag. While I was warm and toasty at night, I think it was a tad overkill. Looking back, a lightweight down bag or quilt would have worked a little better, perhaps around 10 degrees. I believe that an Enlightened Equipment 850 fill-down quilt would be a great option.
- Sleeping Pad: While some people call this a luxury item during the summer and shoulder months, sleeping pads become an essential item during winter. Always check the R-Value on your pad to ensure it is insulating enough to resist the cold of the frozen ground you’re sleeping on. We used Peak Slumber Inflatable pads with an R-Value of 4.6, I would not recommend anything under 4 if you’re going to be sleeping on snow. If you want to get even lighter and have the dosh, Thermarest Neo air Xlite, and Xtherm would be some top-of-the-line options.
Note: Just like you regulate your body temperature while hiking by adding or removing layers, it’s important to do the same while sleeping. If you feel yourself starting to sweat while in your bag, try opening it a little bit or removing some of your garments. The cold may wake you up later at night, but it’s better than waking up covered in sweat and freezing your butt off later as it cools down more.
Cooking and Drinking:
- Water Treatment and Storage: Since there was limited water after Little Yosemite Valley, we brought 3L Playtapus water bladders, as well as Iodine, and Iodine neutralizer tablets. It worked great, although looking back I would probably have swapped it out for a Katadyn Filter blader, or a Sawyer Squeeze. Just be sure to sleep with your filter in your bag so it doesn’t freeze at night!
- Stove/Pot: Trying to keep this as light as possible was a breeze with the MSR Pocket Rocket. We carried the medium size gas canister which was more than enough to cook our food, as well as melting snow for coffee every now and then. We paired this with a Stanley 3 cup Aluminum cook pot, and an insulated cup. I think that the setup worked very well, although I will be bringing a lighter pot the next time I return. I’m currently using the Jetboil Stash stove, and titanium Pot with a homemade cozy.
- Bear Can: While bear cans are available at the backcountry office, the ones they provide you with are extremely heavy, and probably overkill for a 2-3 day trip. I’d recommend a Bearvault BV-500, or BV-450
Food:
Our food consisted of:
- Four freeze-dried Mountian House meals.
- Two bagels with some peanut butter packets.
- Four Oatmeal packets.
- Beef jerky
- Hella Clif bars
- Mio Energy
- Instant Coffee
- A whisky nip
- Some trail mix.
I think we brought just enough food.
Ending Thoughts…
Oh, you’re still here?? Don’t you have some trip planning to be doing? HA! Anyways…
Clouds Rest in the winter is arguably probably one of the best hikes in Yosemite Valley, and if you time it right maybe ever?? It’s rare to get such a classic spot all to yourself, and great camping spots, easy water, and relatively uncomplicated logistics mean that there is no reason why you shouldn’t be able to do this hike on your own.
I sincerely hope that you have as much fun as I did and that you too get to experience the magical journey that is Yosemite in the winter.
Feel free to reach out with any specific trip questions!